Block: Custom Text Field Based on Condition
This feature enables the retrieval of custom text from customers. For instance, Customers may provide specific instructions for customization, packaging, or delivery.

Steps to make a custom field on the checkout page.
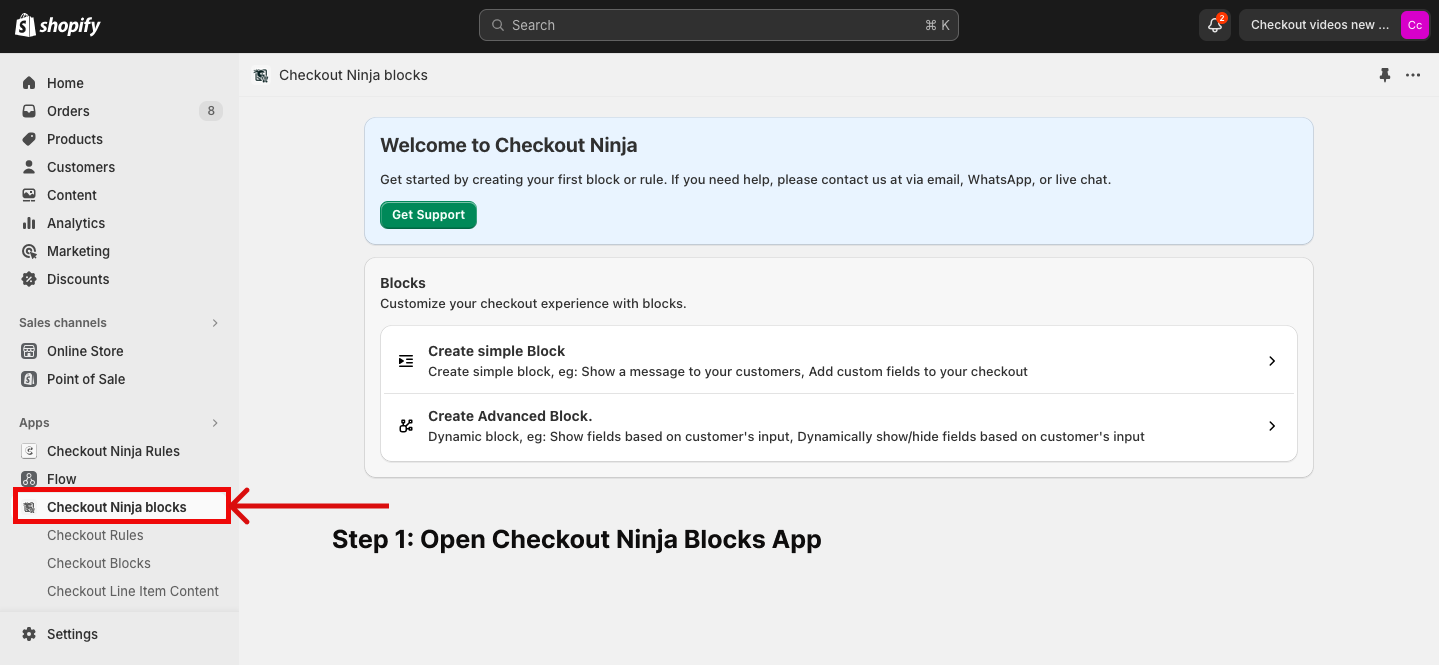
Step 1: Open Checkout Ninja Block App
Open the Checkout Ninja Blocks App from your store admin panel.
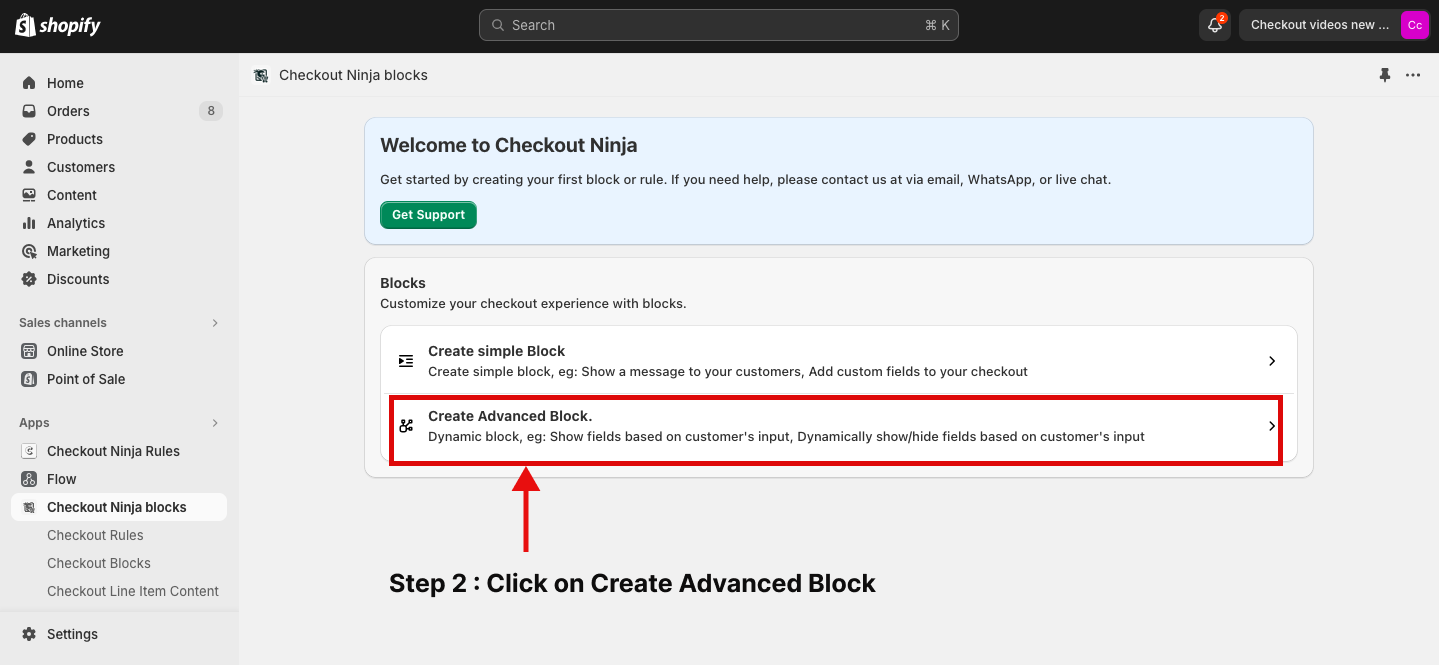
Step 2: Click on the “Create Advanced Block”
The advanced block is to create Dynamic Blocks that are working conditionally. Like show text field when the gift card is applied.
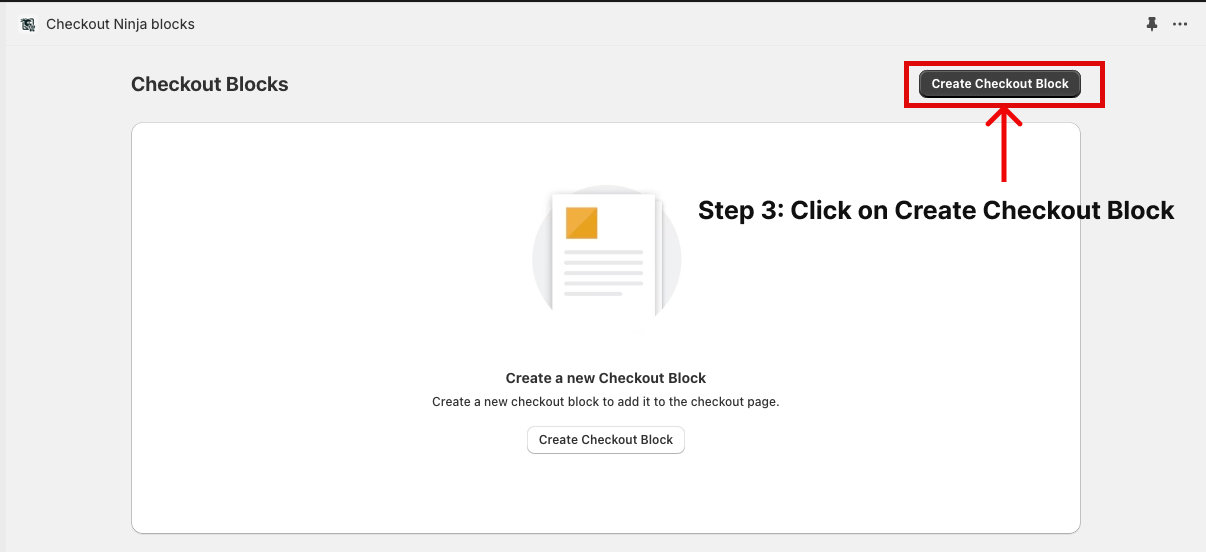
Step 3: Click on Create Checkout Block
The step is to create new block on Checkout Ninja Blocks.
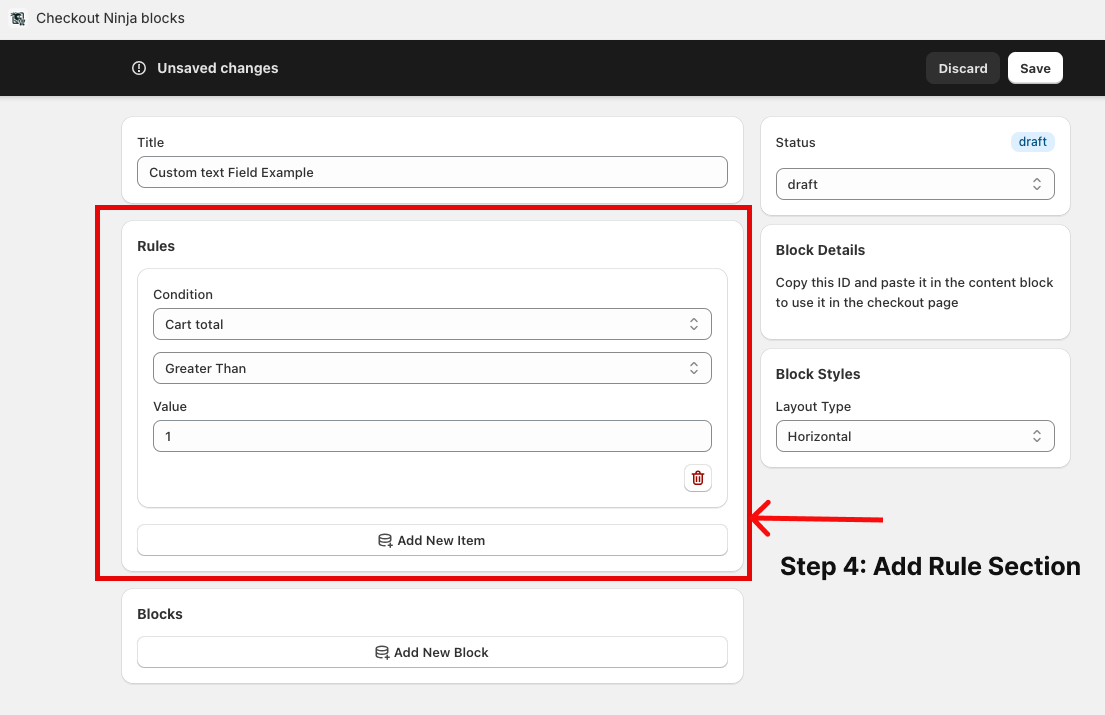
Step 4: Add Rule Section
The step is to add rules to the custom text filed when the block will appear.
The conditions you can apply,
- Cart total
- Varient Not in Cart
- Varient in Cart
- Customer billing has Phone
- Customer billing has Email
- Shipping Address
- Country
- Gift Card is Applied
If you need any other conditions, you can mail to [email protected].
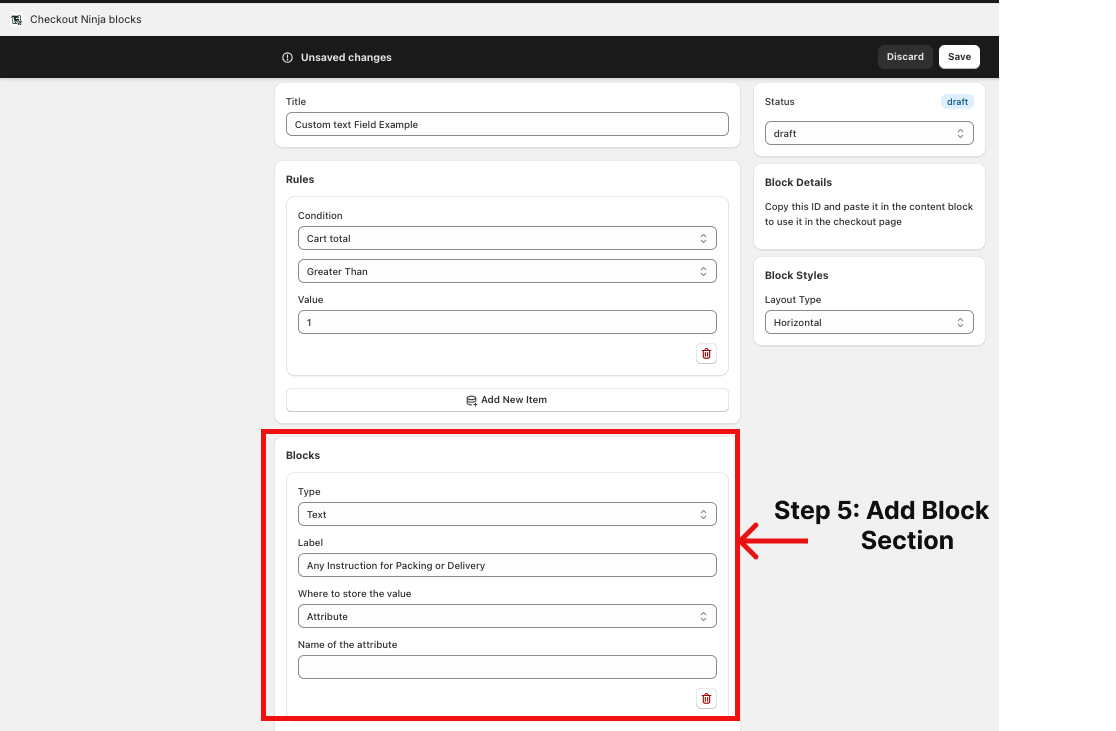
Step 5: Add Block Section
This is the main section.
-
Select Text from type of block
-
Label the content that to be displayed on text field
-
You have two options to store the value.
1.Attribute :Type the Name of the attribute
2.Metafield. :Type the Namespace and Key of metafield
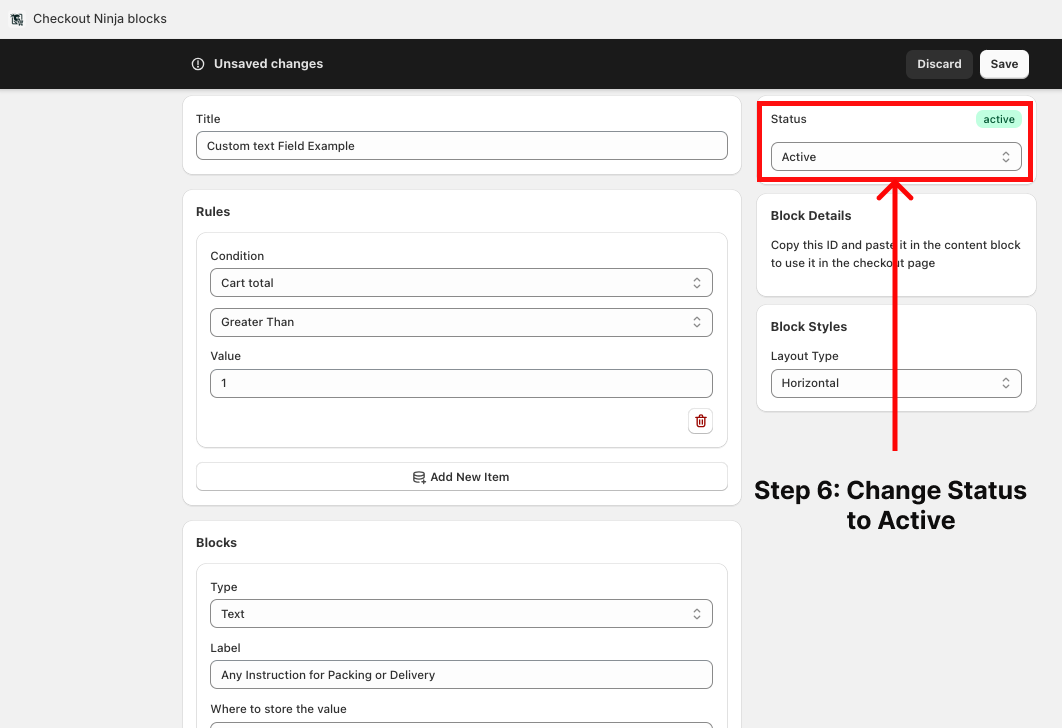
Step 6: Change Status to active
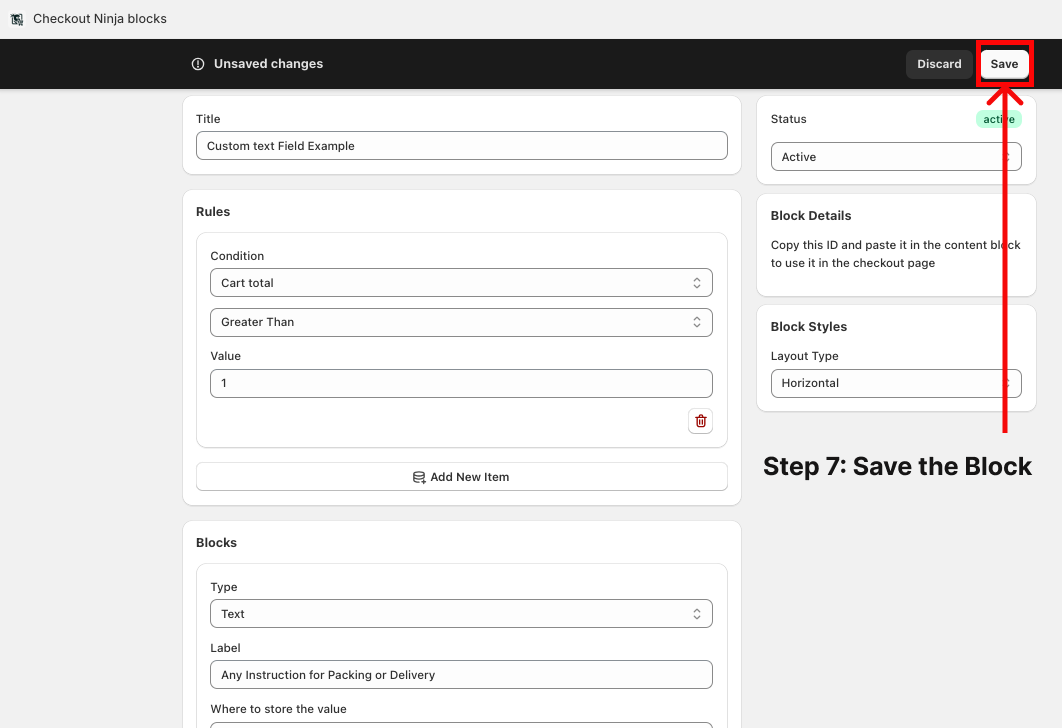
Step 7: Save the Block
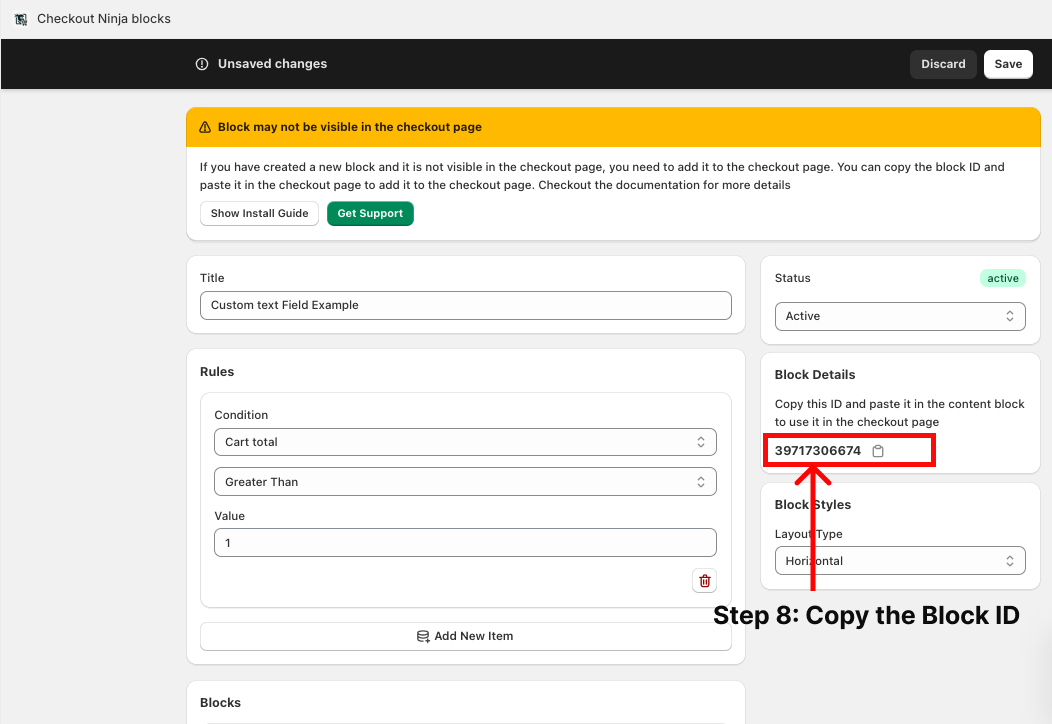
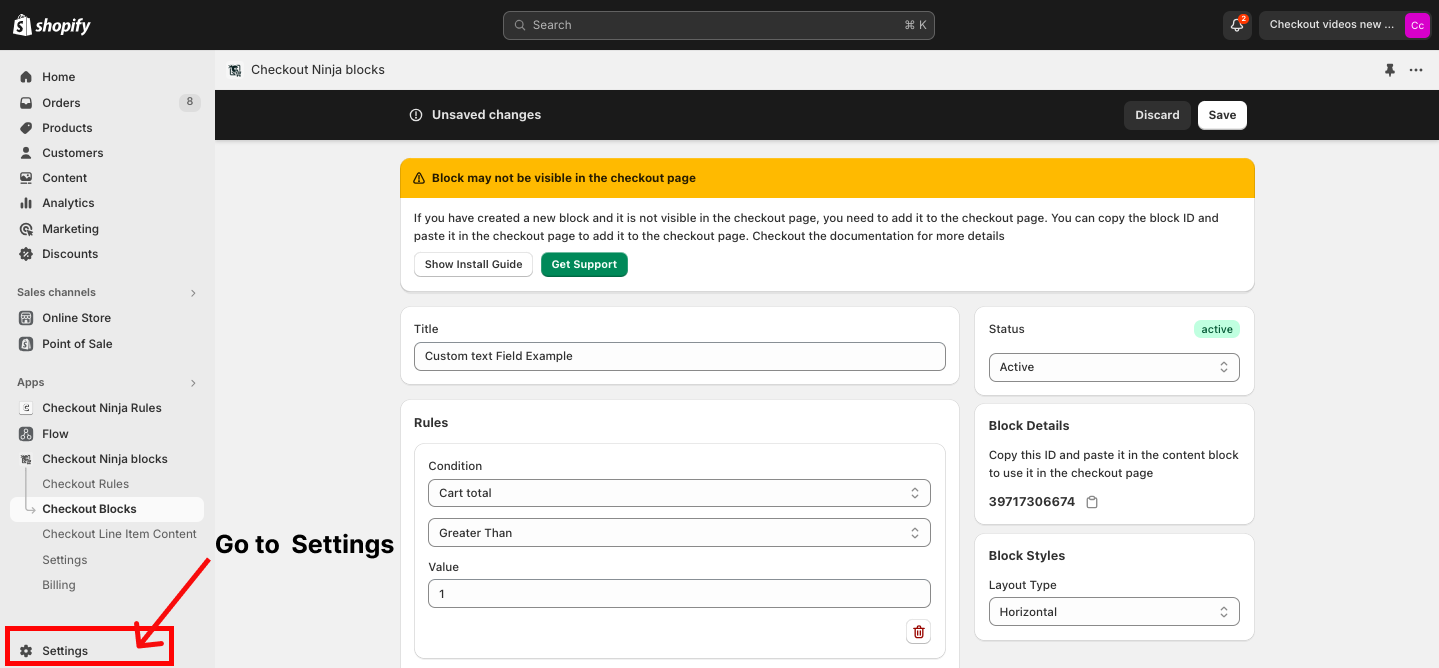
Step 8: Copy the Block ID
Block ID is a main component of the block. Copy the Block ID.
Step 9: Go to Settings
Click on the Settings button.
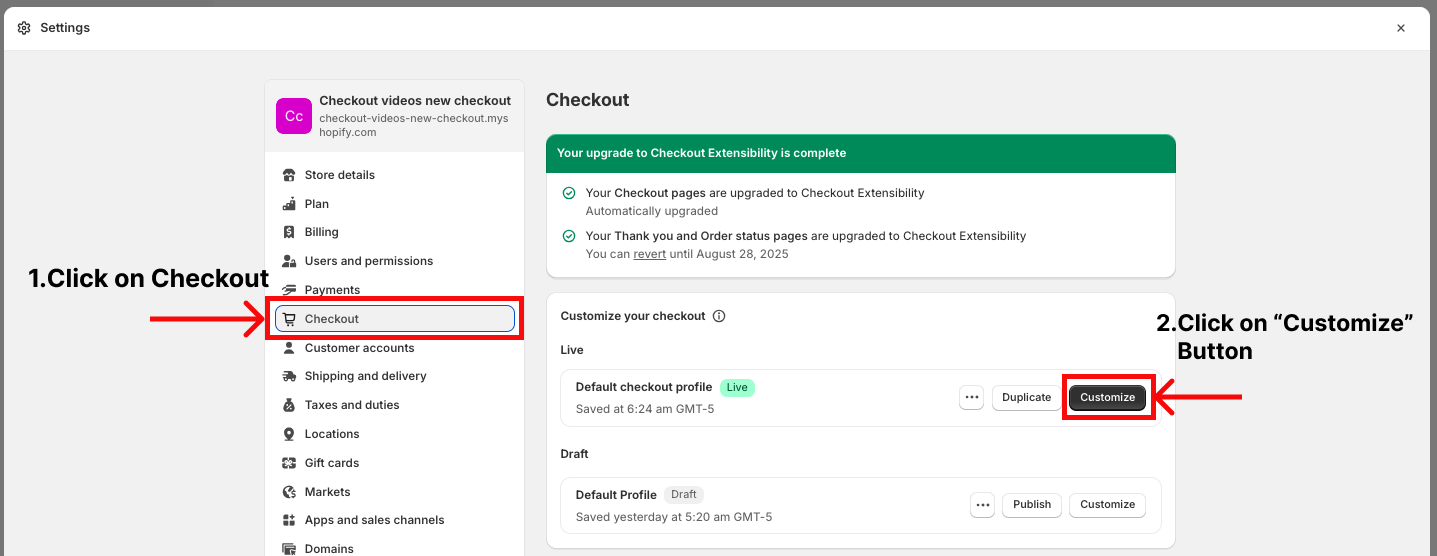
Step 10: Click on the Checkout
Firstly click on the “Checkout” from the settings. Then click on the “Customize” button.
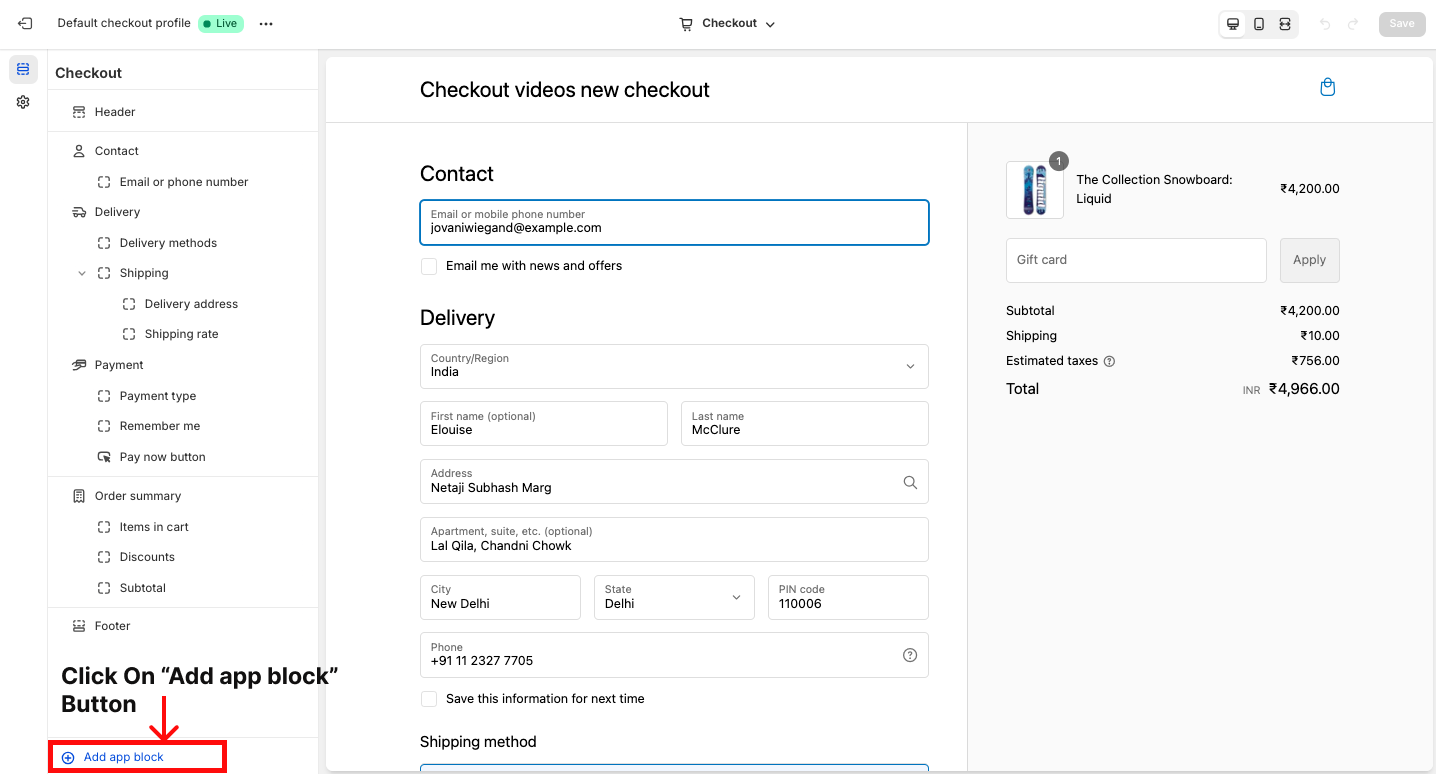
Step 11: Click on the “Add app block”
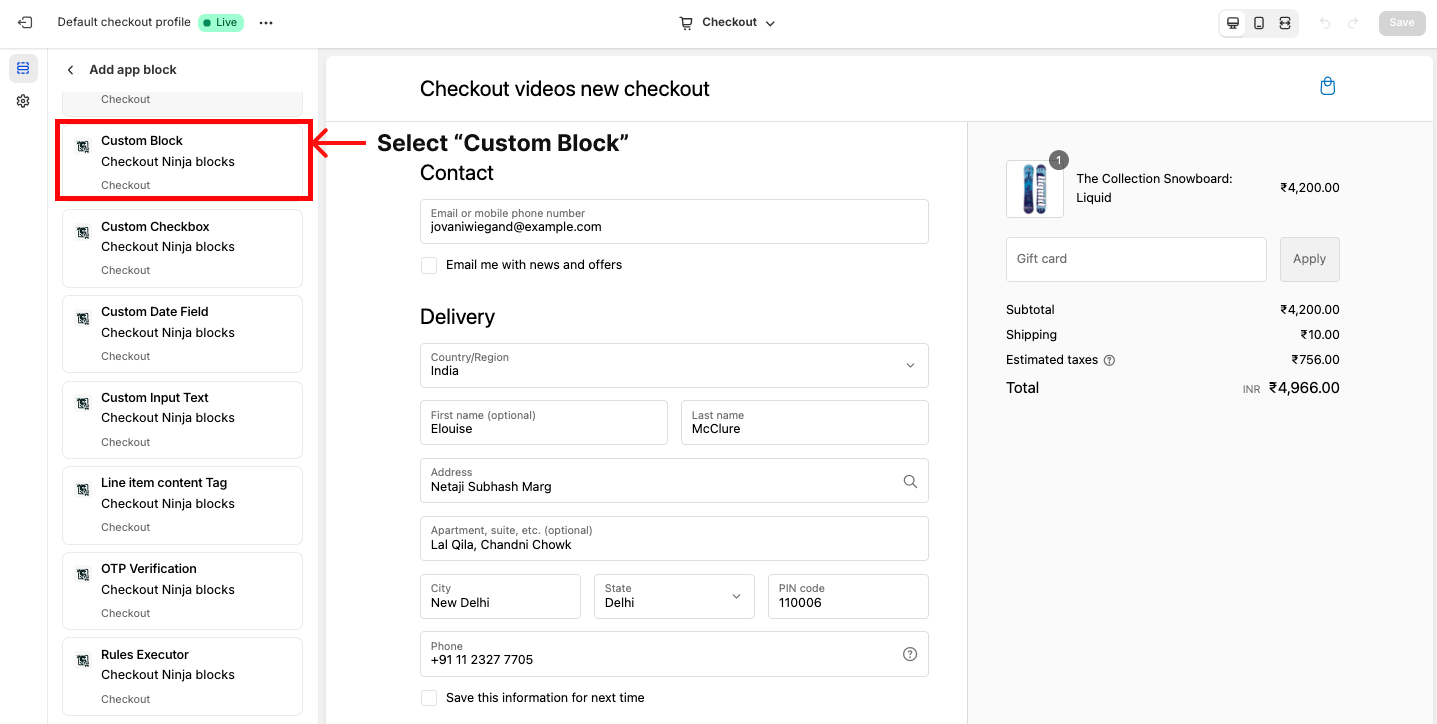
Step 12: Select the “Custom Block”.
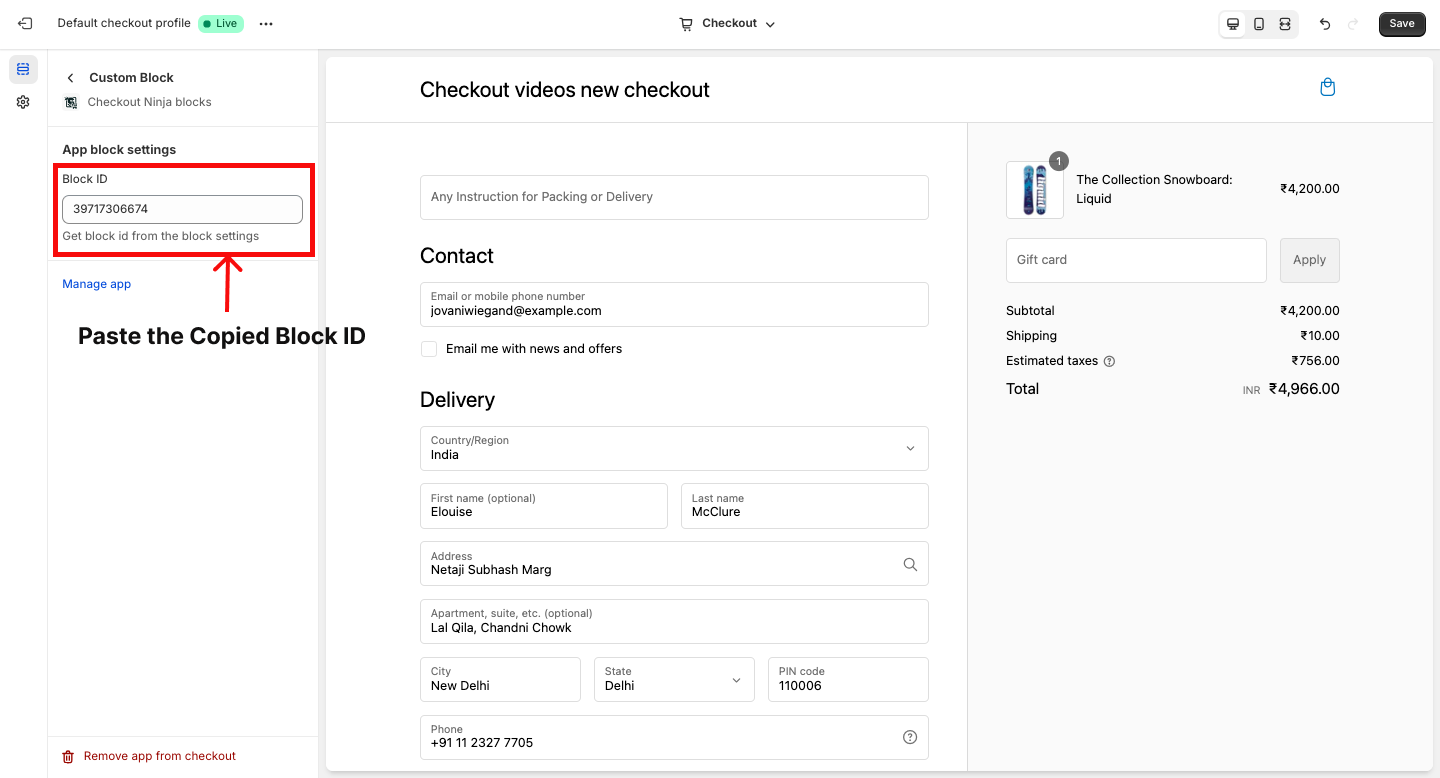
Step 13: Paste the Block ID
You need to paste exact the Block ID that copied from the app admin portal.
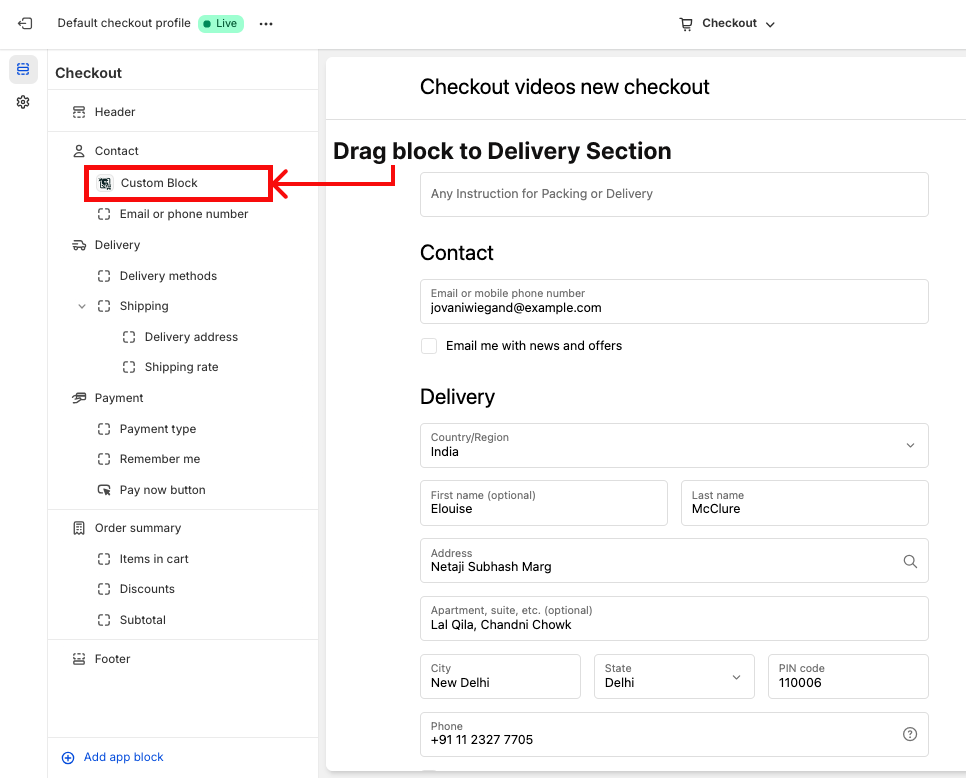
Step 14: Drag the Block
You can drag the block from contact to delivery or payment or order summary according the condition of the block.
Step 15: Save the changes
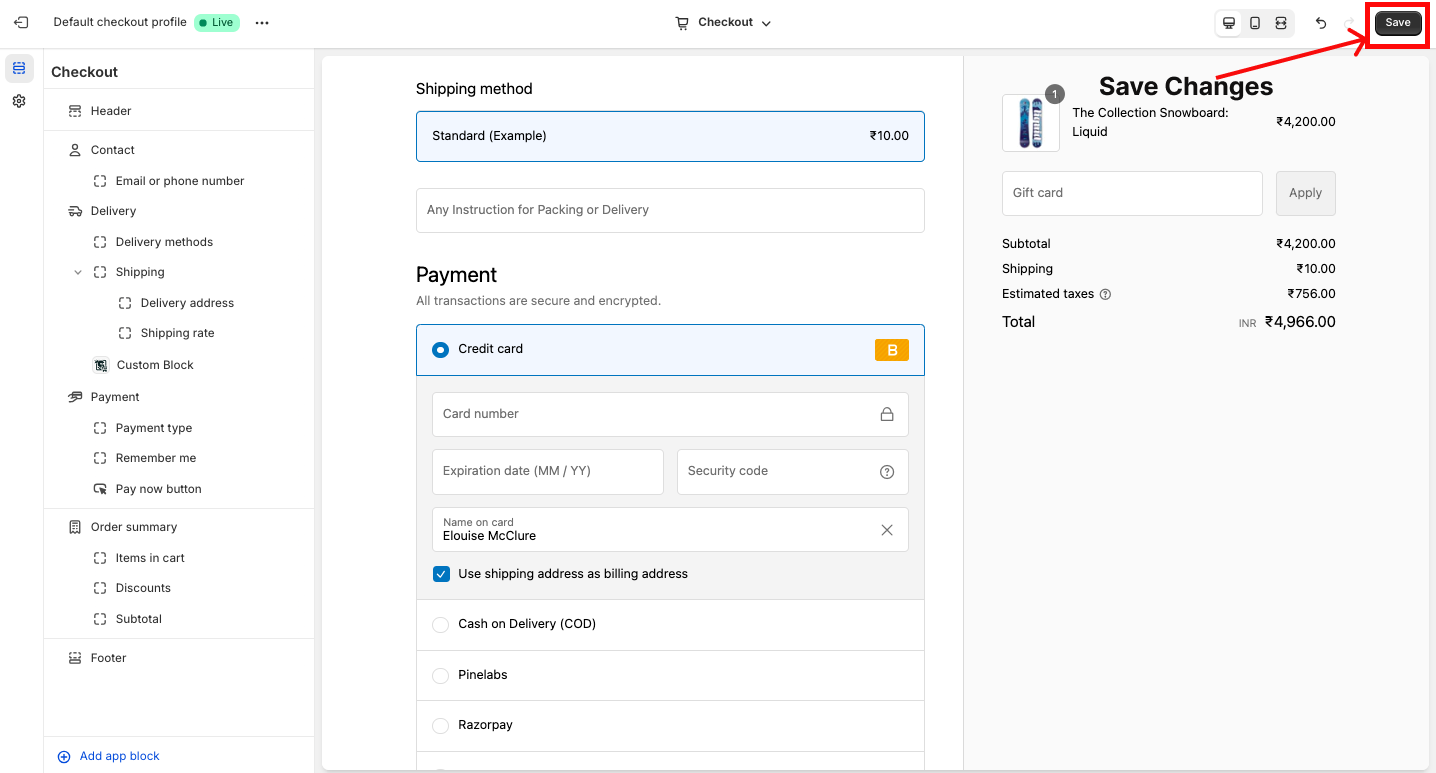
After saving the block is live on the checkout.