Review date: 2025-09-02
How to Add a Countdown Timer to Shopify Checkout: Complete Guide for Conversion Optimization
Learn how to add a countdown timer to your Shopify checkout page using Checkout Ninja to create urgency and reduce cart abandonment.
Prerequisites
- Shopify Plus store (required for checkout extensibility)
- Admin access to your Shopify store
- Checkout Ninja app installed and configured
Video Tutorial
Step-by-Step Guide
Step 1: Install the Checkout Ninja App from Shopify App Store
- Search for Checkout Ninja: Go to the Shopify App Store and search for "Checkout Ninja".
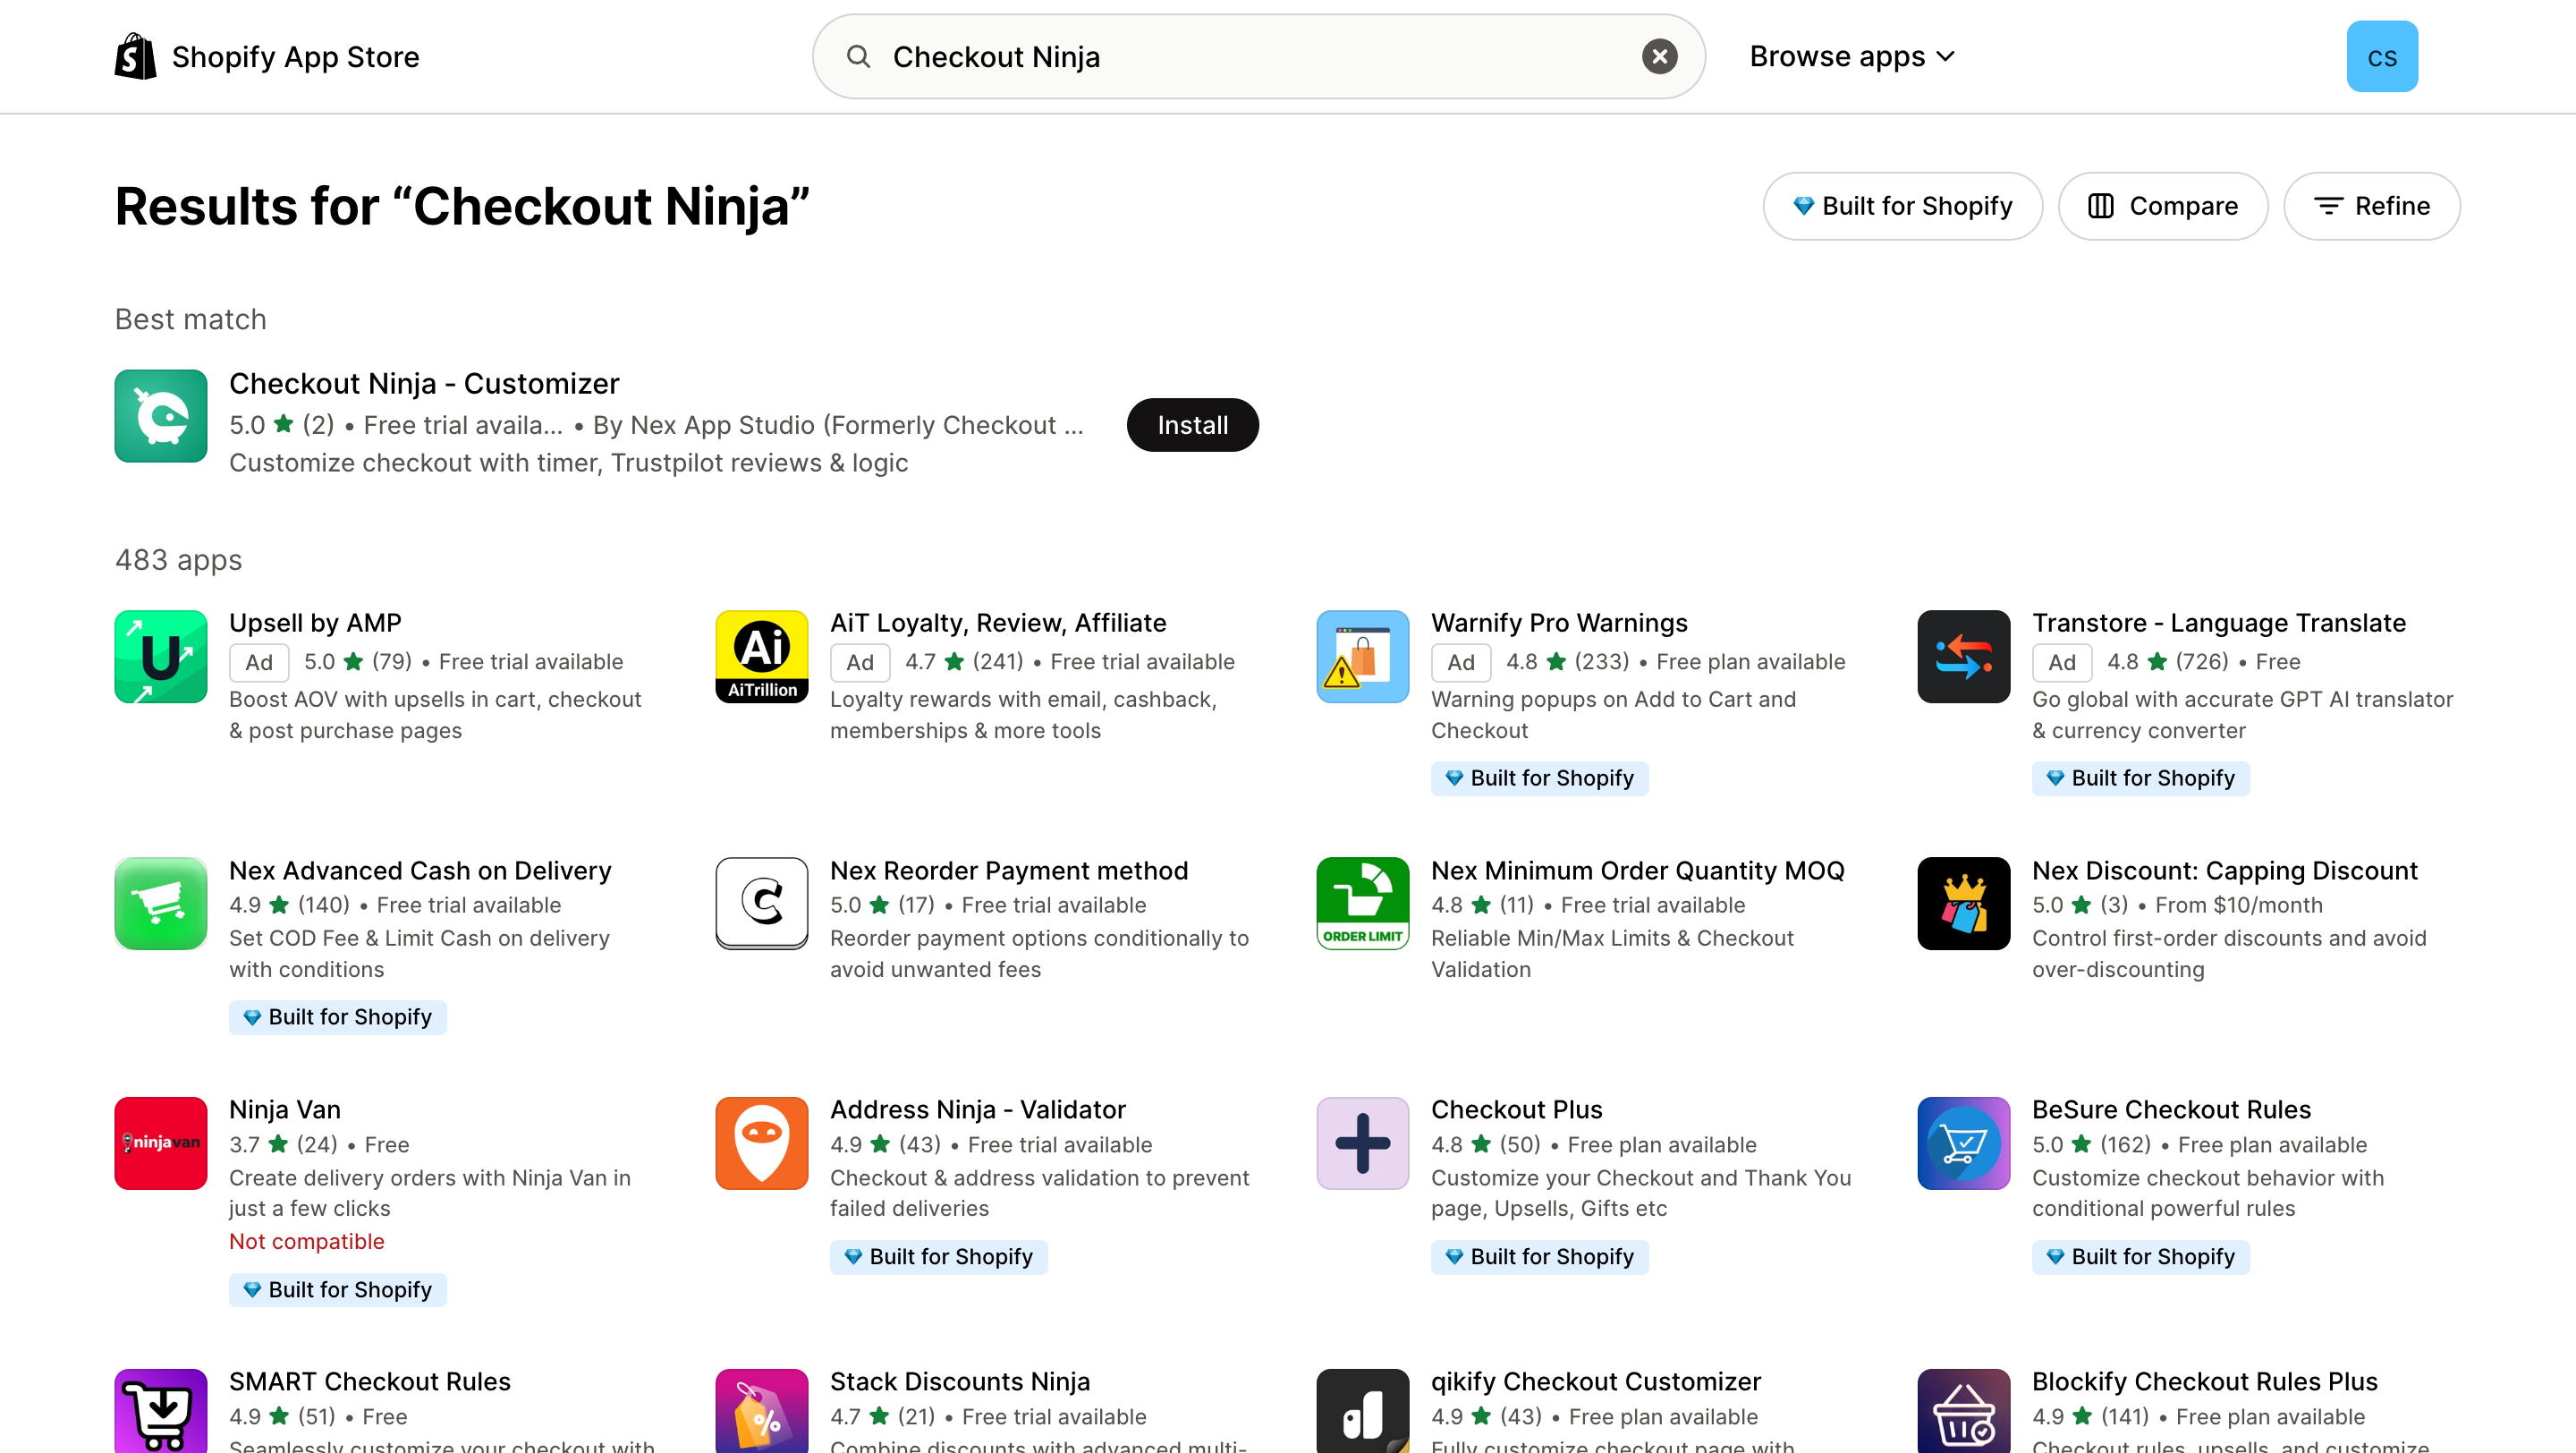
- View App Details: Click on "Checkout Ninja - Customizer" to view the app details and features.

- Install the App: Click the "Install" button to add Checkout Ninja to your store.
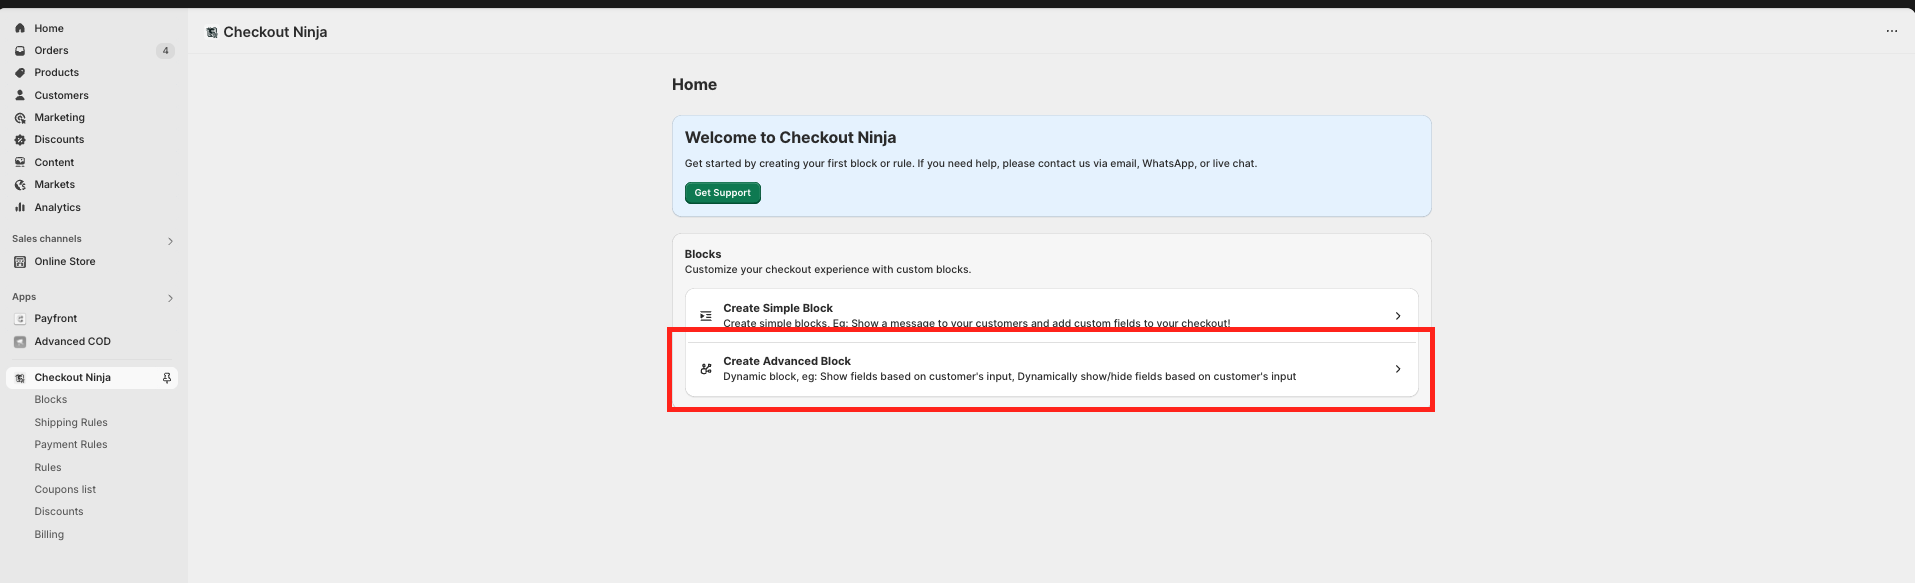
Step 2: Create a New Checkout Timer Block
- Select Create Advanced Blocks: Open the Checkout Ninja app and select "Create Advanced BLock" from the left menu.
- Create a New Checkout Block: Click on the "Create Checkout Block" button.
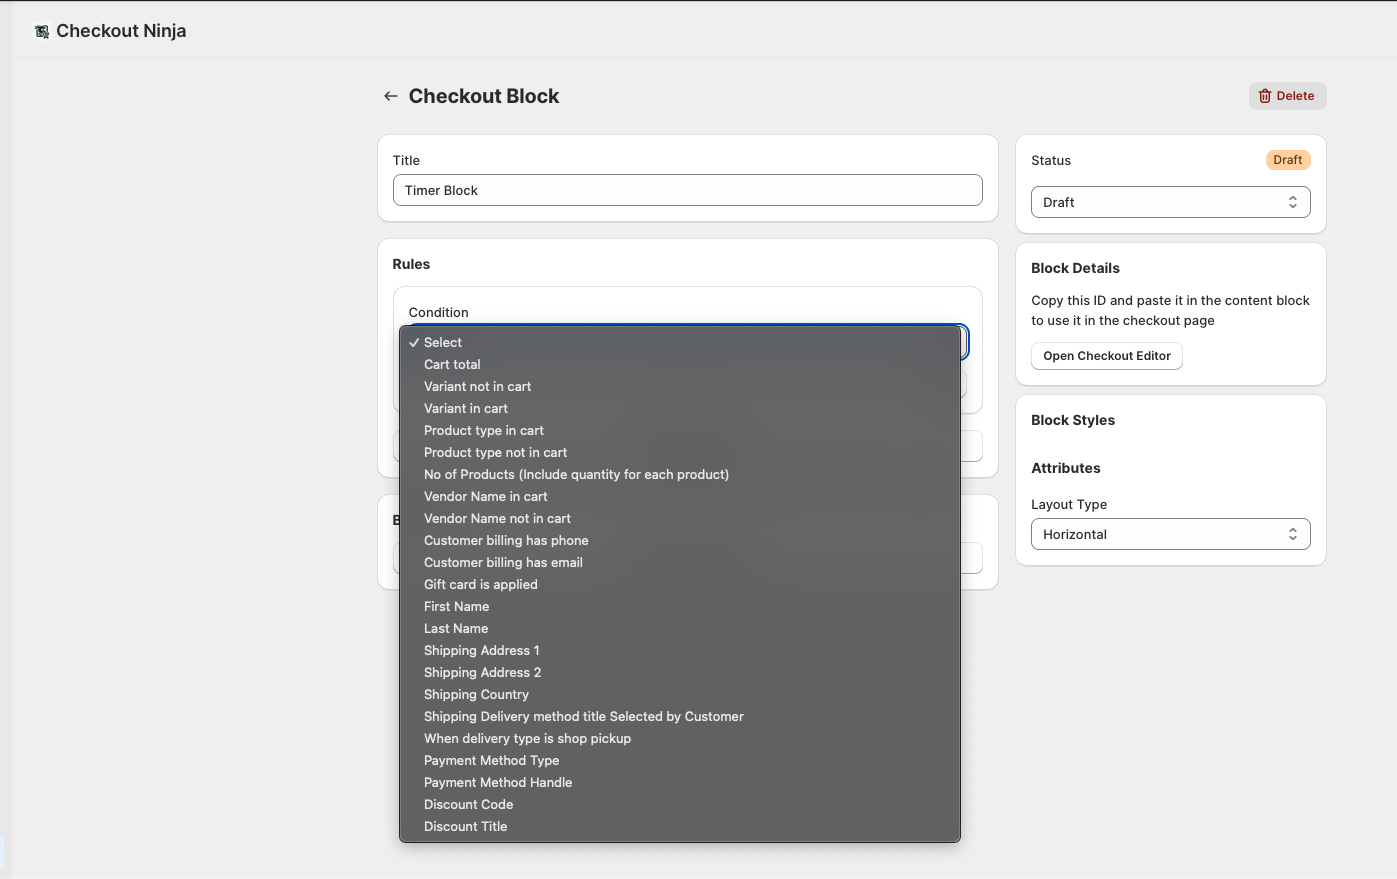
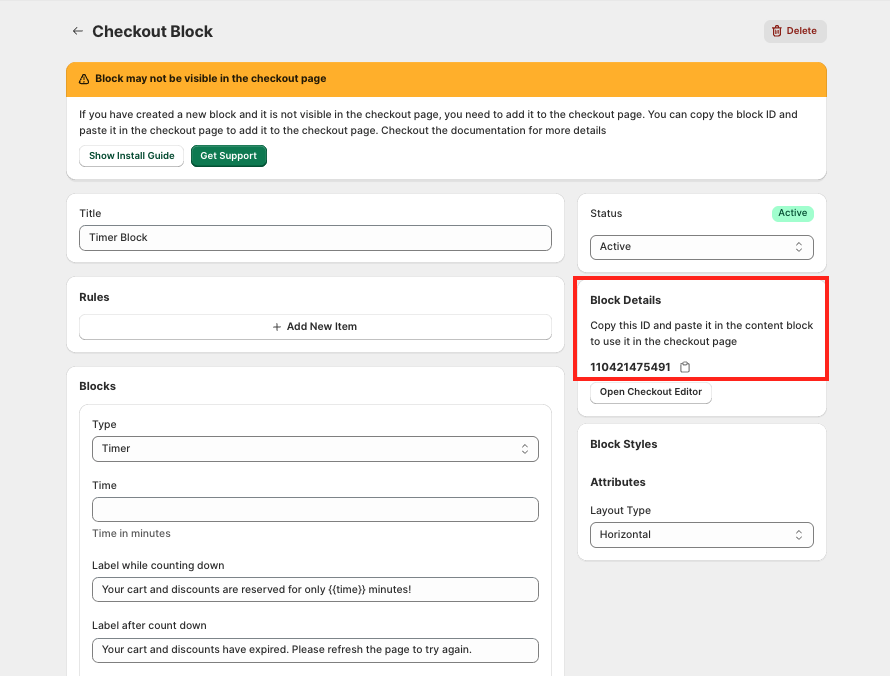
Step 3: Configure Timer Block Title and Settings
- Enter a Title for Your Block: Enter a title for your block, for example, "Timer Block."

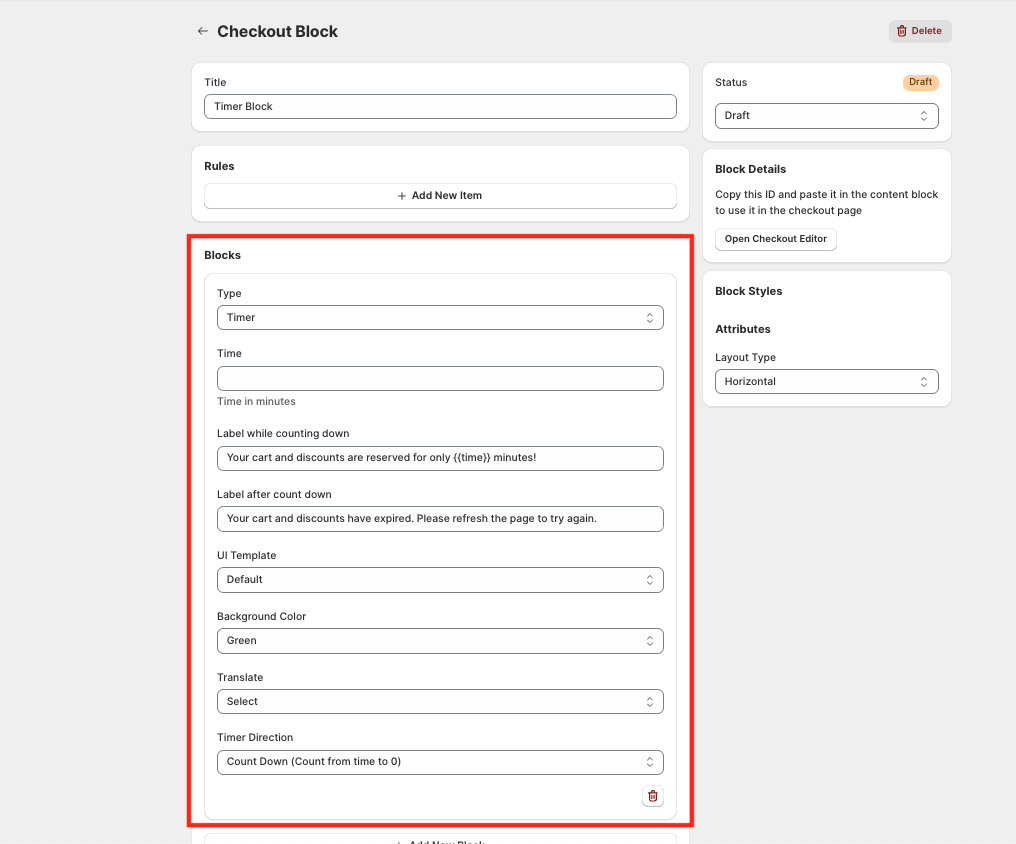
Step 4: Set Up Countdown Timer Parameters and Display Rules
-
Rule Section (Optional):
- In the rule section, specify the conditions under which the block should be displayed. For example, you can set rules based on cart total, customer tags, etc.
-
Block Section:
- Select Block Type: Choose "Timer" from the block type dropdown menu.
- Time Text Field: Enter the time in minutes. For example, type "1" for one minute or "10" for ten minutes.
- The timer field is optional and can be any text. You don't have to follow a strict format or even enter a value; whatever you type will be displayed as entered.
- Running Timer Content: Enter the content to be displayed while the timer is running. For example:
Just a reminder: Your special offer ends in {{time}} . Don’t miss out!{{time}}will dynamically display the time from the time field.
- Label After Countdown: Enter the message to be displayed after the countdown ends. For example:
Time’s up! Your cart has expired. - UI Template Field: Try different templates we have pick one of them.
- Translate Field: Translate field is to translate the minutes and second in your language. Give yes or no, it will automatically translate.
Step 5: Deploy Timer Block to Shopify Checkout Editor
-
Save the Block: After configuring your timer block, save your changes.
-
Copy the Block ID: Copy the block ID for later use.
-
Open Checkout Editor from Settings: Click on
Open Checkout Editorbutton.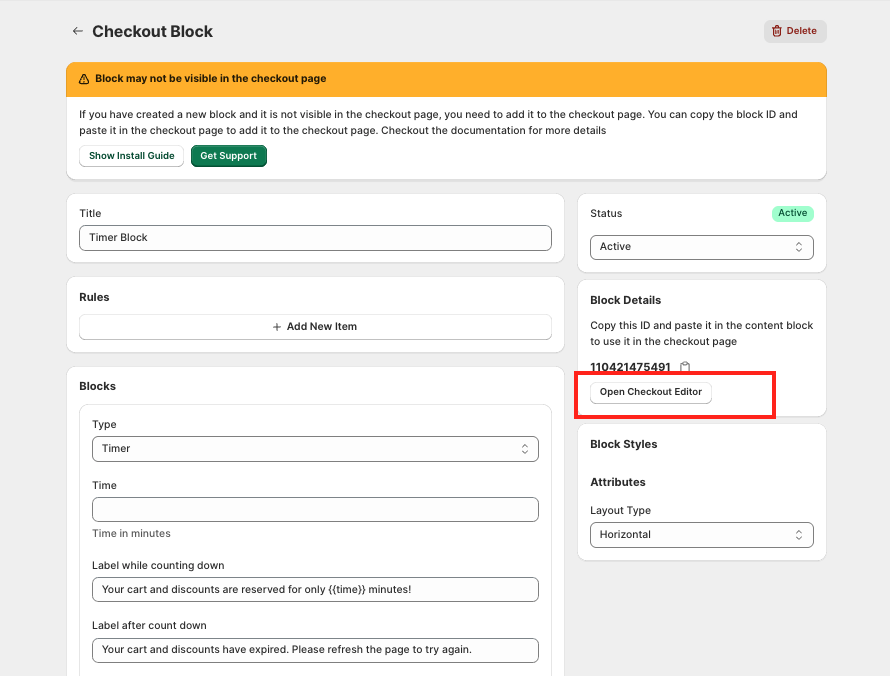
-
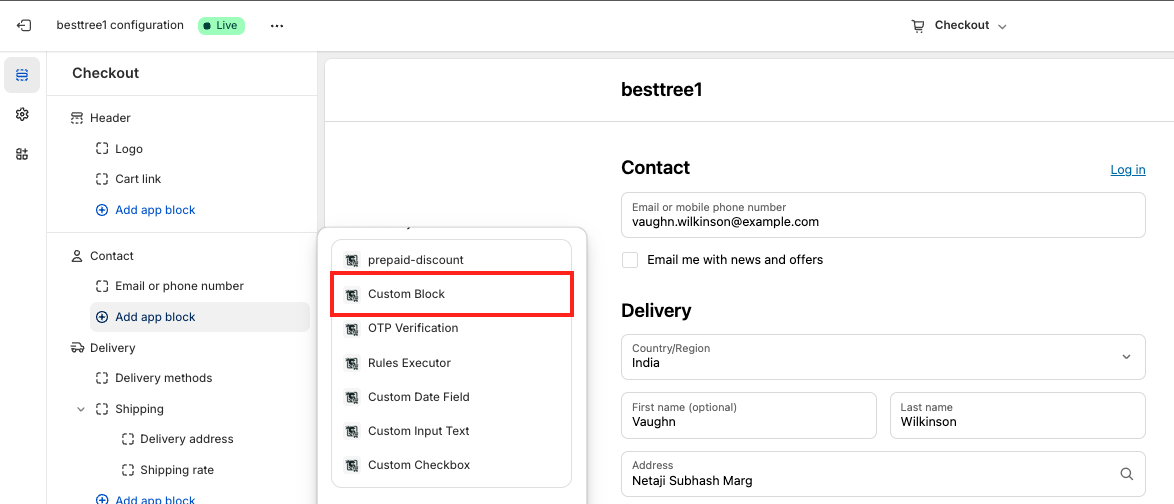
Add App Block: Click on the "Add App Block" button.
-
Select Custom Block: Choose "Custom Block" from the menu.
-
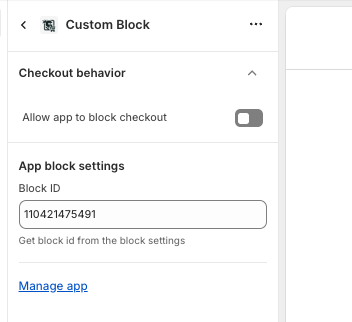
Paste the Block ID: Paste the block ID you copied earlier and save the changes.
-
Make the Block Live: Save the changes in the checkout editor page.
Step 6: Test Your Timer
- Test the Timer Block: Go through the checkout process to ensure the timer appears correctly and displays the expected messages.
Tips
- Timer Duration: Start with 10-15 minutes for most products
- Messaging: Use action-oriented language like "Complete your order now"
- Dynamic Variables: Use
{{time}}to display remaining time in your messages - Mobile Testing: Always test on mobile devices where most abandonment occurs